One of Agent Response’s key features, is ithe lead forms. It comes with a range of default forms already built into your account, you can find these from your account by going to Settings > Form builder.
On the Form Builder page, there will be a table with a range of forms. The columns you there will give you more information about the forms;
- Name - the title of the form. Some will also have what type of lead it is used for (e.g. Lettings or Sales)
- Type - the type of action the form is geared towards, these are also used for filtering the form types in the Activity page
- Viewing - application to view a property
- Feedback - request feedback after viewing a property
- Application - apply for the property
- Instruction - instruct on a property
- Valuation - request a property valuation
- Custom - a custom form that does not fit into the other categories
- Property type - the types of property this application is sued for. In most cases, it’s all, but there are a couple of Commercial specific property forms
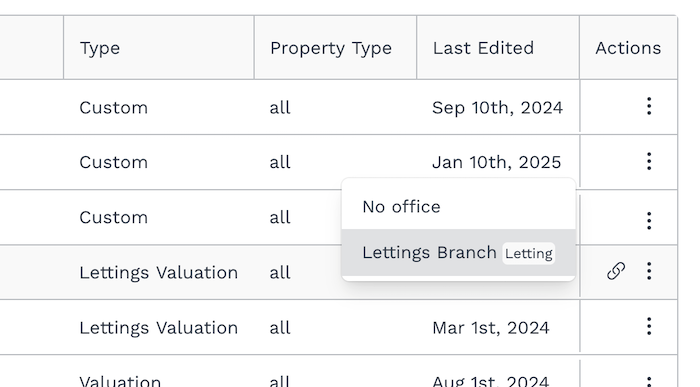
- Actions - where you can edit/view the form questions and get a live link to the form
You can view the questions in the form by clicking on the title
Getting a live link to the form
To get a live link to the form, so you can test how it works and view it from a lead perspective, there are 2 ways of doing this;
From the form table, by going to the Actions column, hovering the mouse there will bring up a chain link symbol, click this and then select one of the offices from the dropdown, this will open up the form in a new tab.
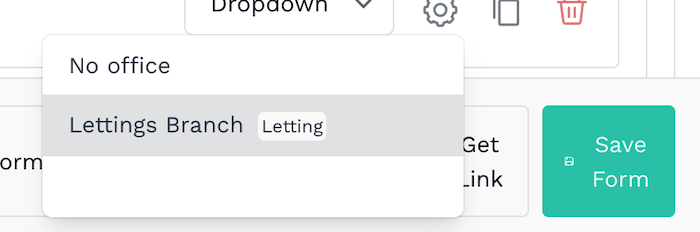
From within the form, while looking at the form questions, in the bottom right there is a Get a Link button, click this, and select an office. The form link will open in a new tab.
Form builder editing
If you need adjustments to the form, the default forms have limited editing ability, so you will need to Create New Form from the button at the top. You will be presented with a range of templates, which are based on the default forms. If you are not sure which form to choose, we’d advise checking the default forms available, based on what you want the form to do e.g. for responding to leads from the portals, you’ll want to look at the Sales/Letting Viewing forms.
As there are so many settings available, we will go over the basics of how the forms are laid out and the basic editing and updating of forms.
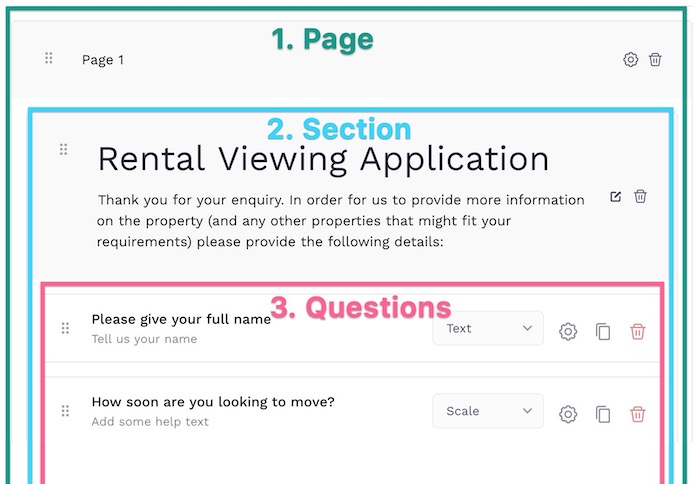
1. Page
The page splits your questions onto separate pages, this helps break up the form from being a single continuous page and also allows for better structuring of the form to separate related questions into different pages.
2. Section
Sections let you breakdown questions on the same page into different sections. A section has an area to add a description, which will show above the questions you add into the section.
You can edit the Section text from clicking the edit symbol on the right hand side.
3. Questions
The questions are what you are wanting your leads to complete. There are multiple types of questions you can add. To add a new question, go to the end of the section you want to add the question to and you will see an Add New Question button.
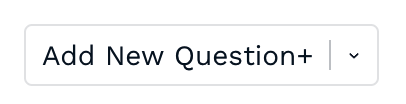
Clicking the little arrow will bring up a range of pre-set questions you can add, these questions can not be edited.
Clicking the main text of the Add New Question button will create a new custom question. The different question types you have available are;
- Text
- Scale
- Dropdown
- Multiple choice
- Date
- File upload
- Toggle
- Signature
You can edit the text and help text by clicking on the respective section of the question. You can also change the order of answers by dragging and dropping them.
Form settings
At the bottom of the screen, there is a Form Settings button, there are multiple tabs in here, we will look at the main ones you can use to customise the form.
Theme tab
Here you can change the appearance of the form
- Form Heading is the internal label you can give the form, e.g. Custom Lettings Viewing Form.
- Logo lets you add your agency logo to the form, which will appear at the top of the form.
- Theme Colours lets you change the colour of the buttons on the form.
- Font Family allows you to change the font used in the forms
Settings tab
This lets you update how the form is viewed by the system.
- Form Type is how the system will categories the form in the system, you should select the form type that fits the type of enquiry this will be used for e.g. a Sales or Lettings viewing request form should be set as Viewing
- Property Type is what kind of property this form should be used for. In most circumstances All should be fine, unless you need to send specific forms to Residential and Commercial properties
- Redirect is the page you can send people to after they complete the form
- Thank you message is the text that will show on the page, after the form has been completed.
Submission Actions tab
These are the journey actions the form does, after it has been completed, by default, there should be 2 in there.
- Lead Email Notification this is a thank you email sent to the lead, after they complete the form. Clicking on this, you can edit the contents of the email.
- Send Email to Estate Agent this send the completed form details to the estate agent, This will have short codes in to pre-fill from the form answers.
If you make any changes, to these settings, make sure to click the Done button and then the Save Form button.
After you’ve finished updating the form, saved it and tested it works, you will need to go to update the Portal Lead System to send the form when you get enquiries from the portal and Phone Lead Management to update the form that’s sent when someone calls the number.
|
Rate this Topic:
|
|||
|