Once you have set up your account and verified it, via the email sent to your email account, you can get started with the set up.
1. Subscription page
The first page you will see is the subscription page, by default you will be set on the Free package, this gives you access to the basic functionality of Agent Response. On this you can integrate and process your email enquires through the Agent Response system.
If you want more advanced features, such as access to phone answering automation, the callback system and the form builder, you will need to change to one of the other packages (Starter or Professional).
To do this, Click the Choose [package] button above the preferred package where you will be taken to enter your billing details.
Once you are on the desired package, you can move to the next steps.
Note: If you choose the Free package, you can view most of the areas, but may have limited editing or functionality.
2. Integrating with the portals
Next will be integrating Agent Response with the portals. To do this, from the Settings area, got to Offices in the left hand menu.
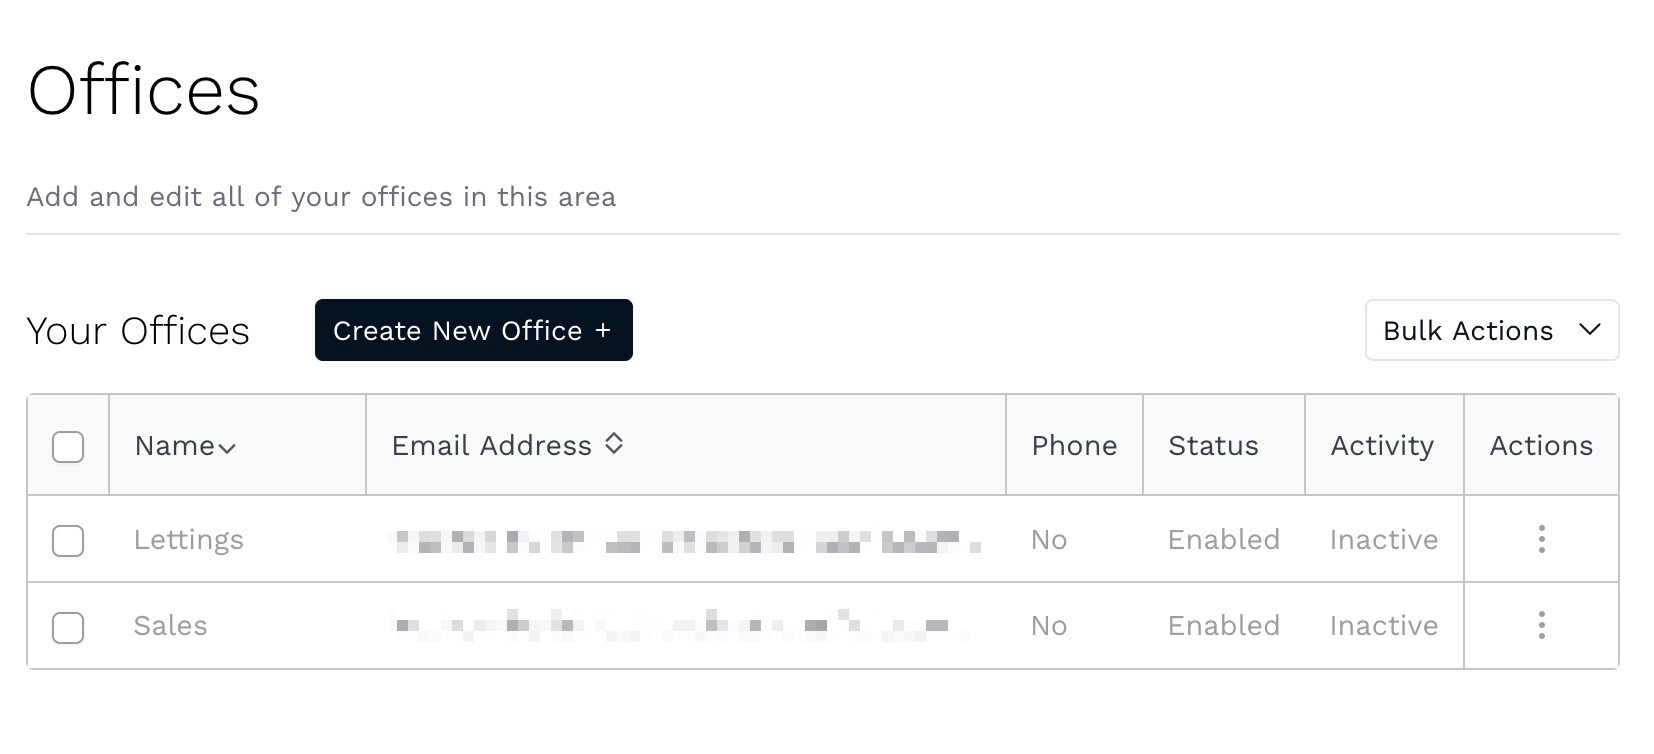
By default, in your account you will have a Lettings and a Sales office already set up in the system. The Offices control the settings for where your leads are sent. On the right hand side, you'll want to click the three dots icon under the Action column and go to Edit office.
Once you are in the office settings, you will want to review the Branch email, as the account has just been created, the emails will be set to go to that the person who created the account, if you wish for these types of leads to go to a different email, this is where you will change it.
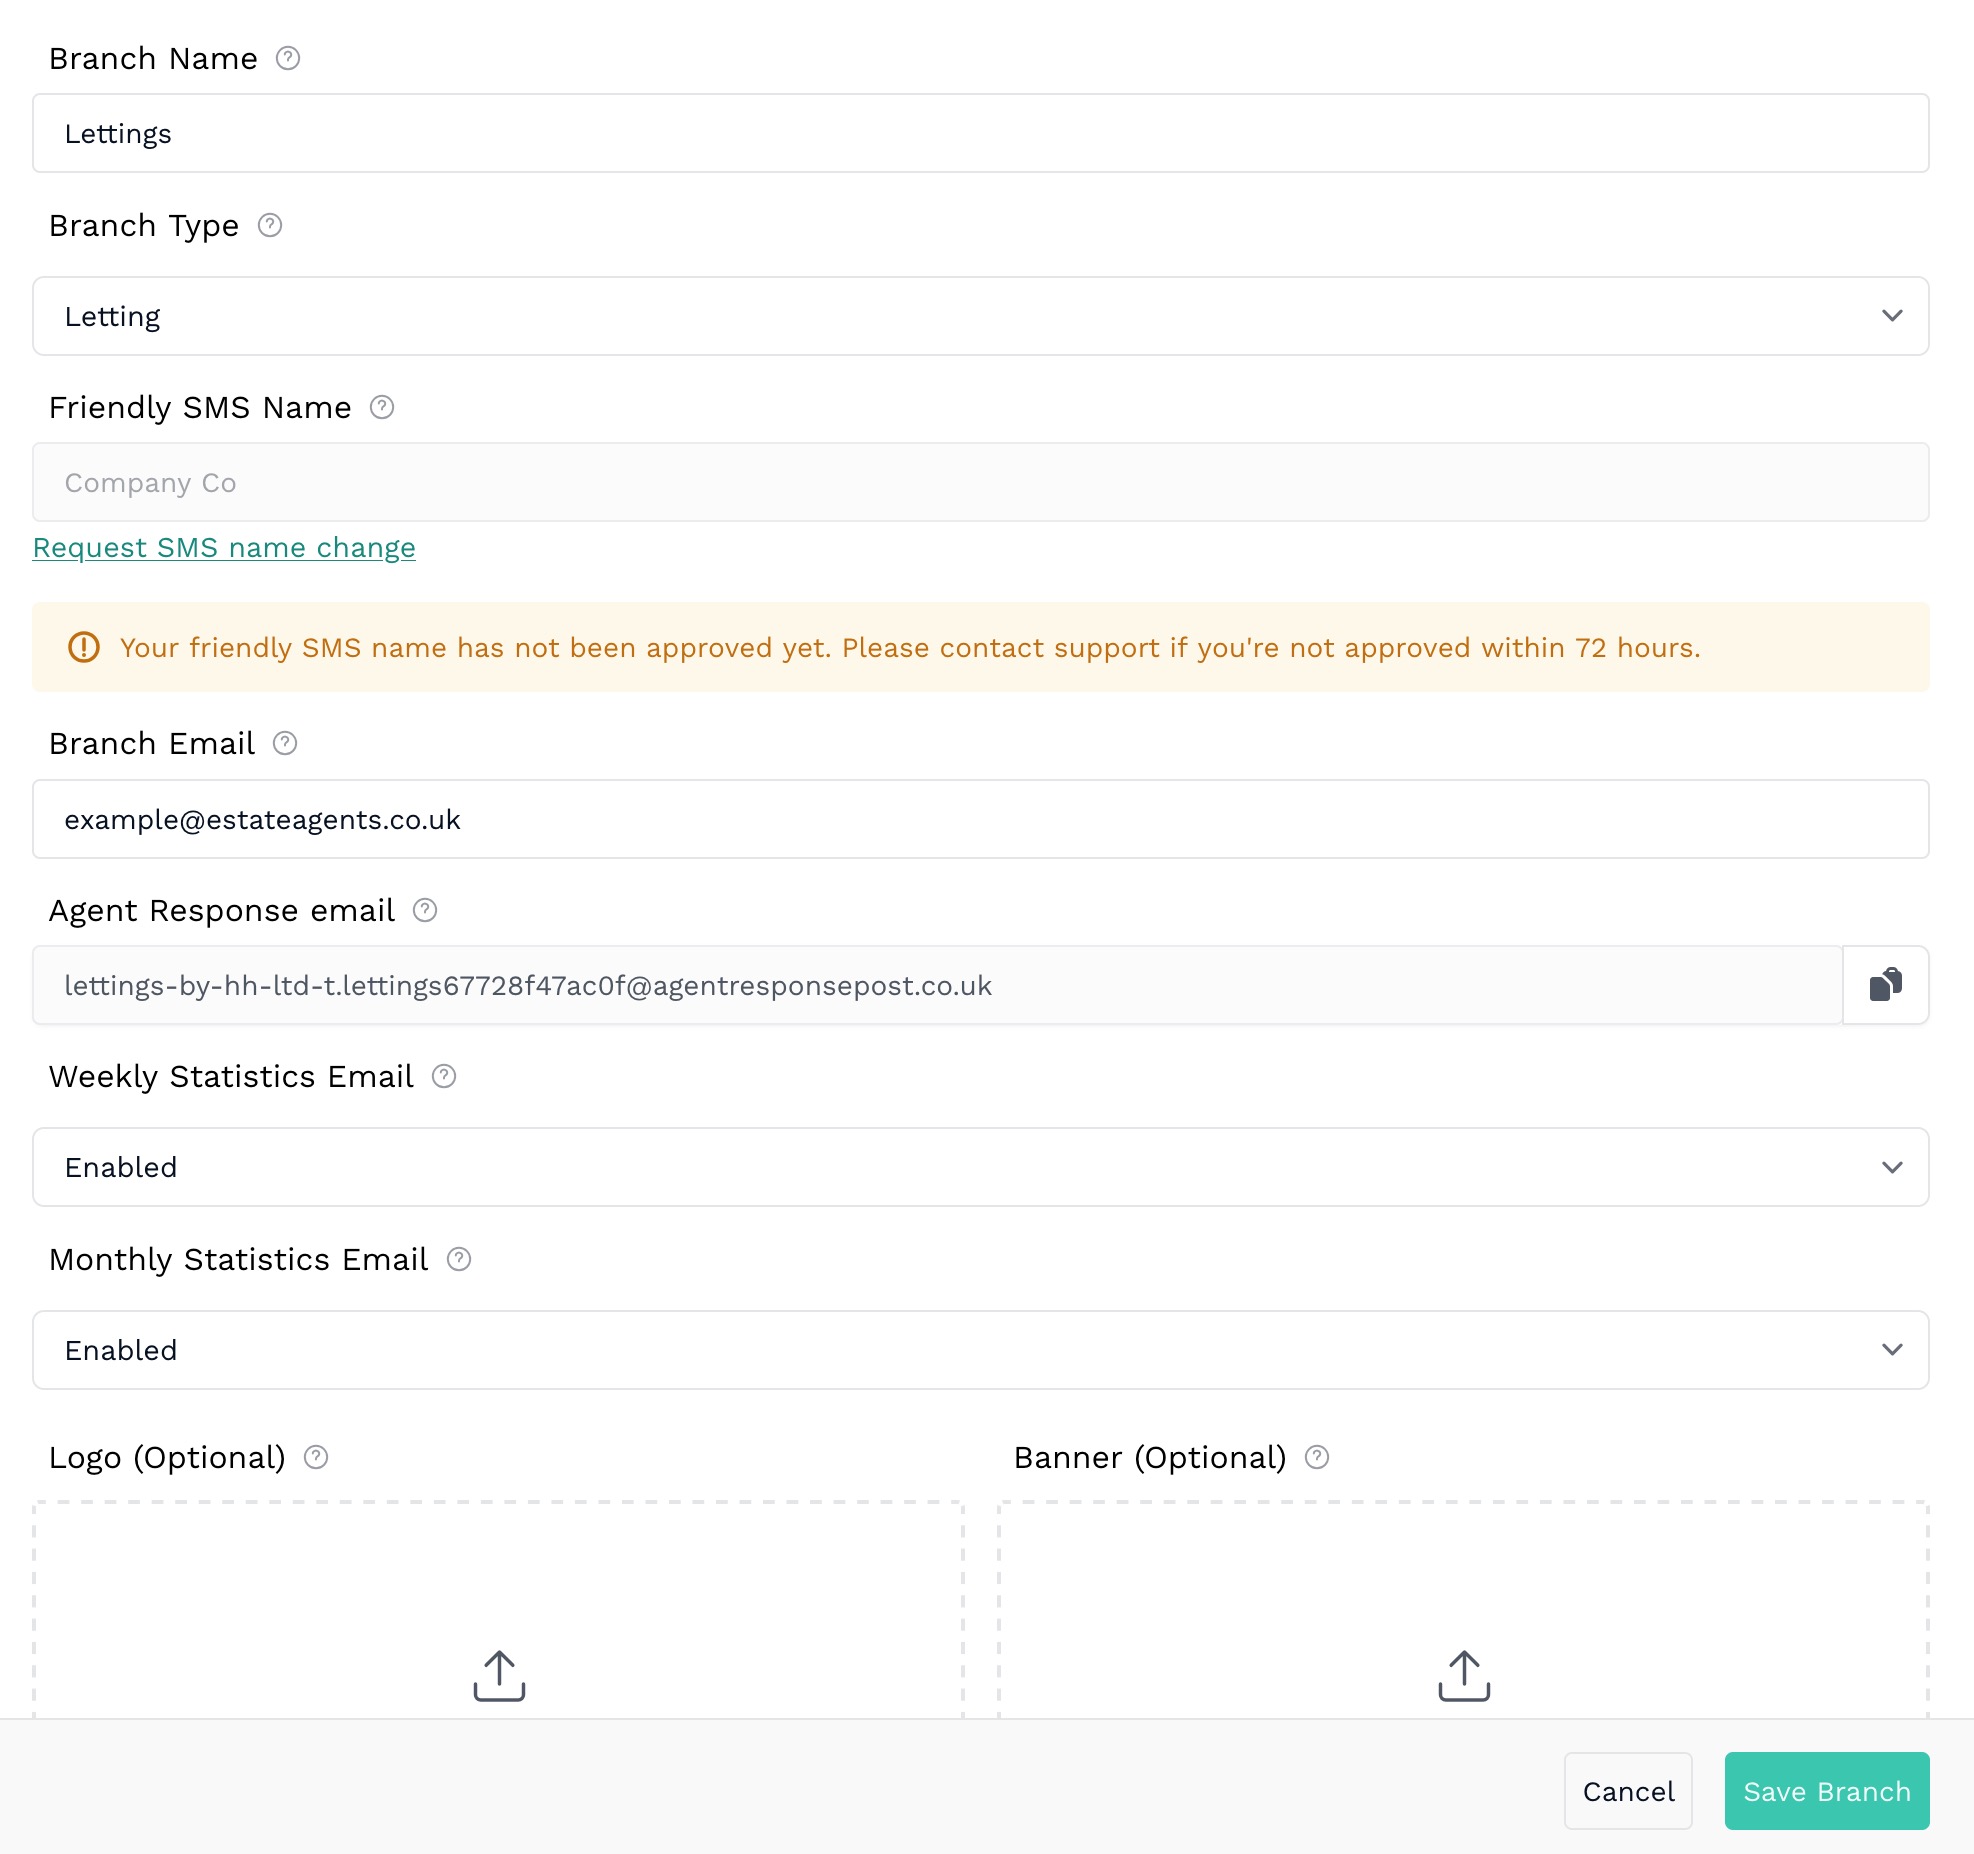
What you will want to do now is copy the email so you can send this to the portals you use and ask them to update to send your Letting or Sales leads (based on the office) to this email address. Below is the email template that will pop up when you copy the Agent Response Email.
We are now using a lead management system, Agent Response, to process our leads.
Please could you update our letting property contact details, so that leads are sent to: [AGENT RESPONSE EMAIL]
Once you have finished making any changes, Save Branch in the bottom right to save the changes.
Note: If you want to integrate Agent Response with your website, you can find our more here.
3. Choose how you want your leads responded to
While you are waiting for the portals to update to start processing your leads through Agent Response, you can take a look at how your leads will be responded to when they send an enquiry. To do this, from the Settings area, go to Portal Lead System in the left menu.
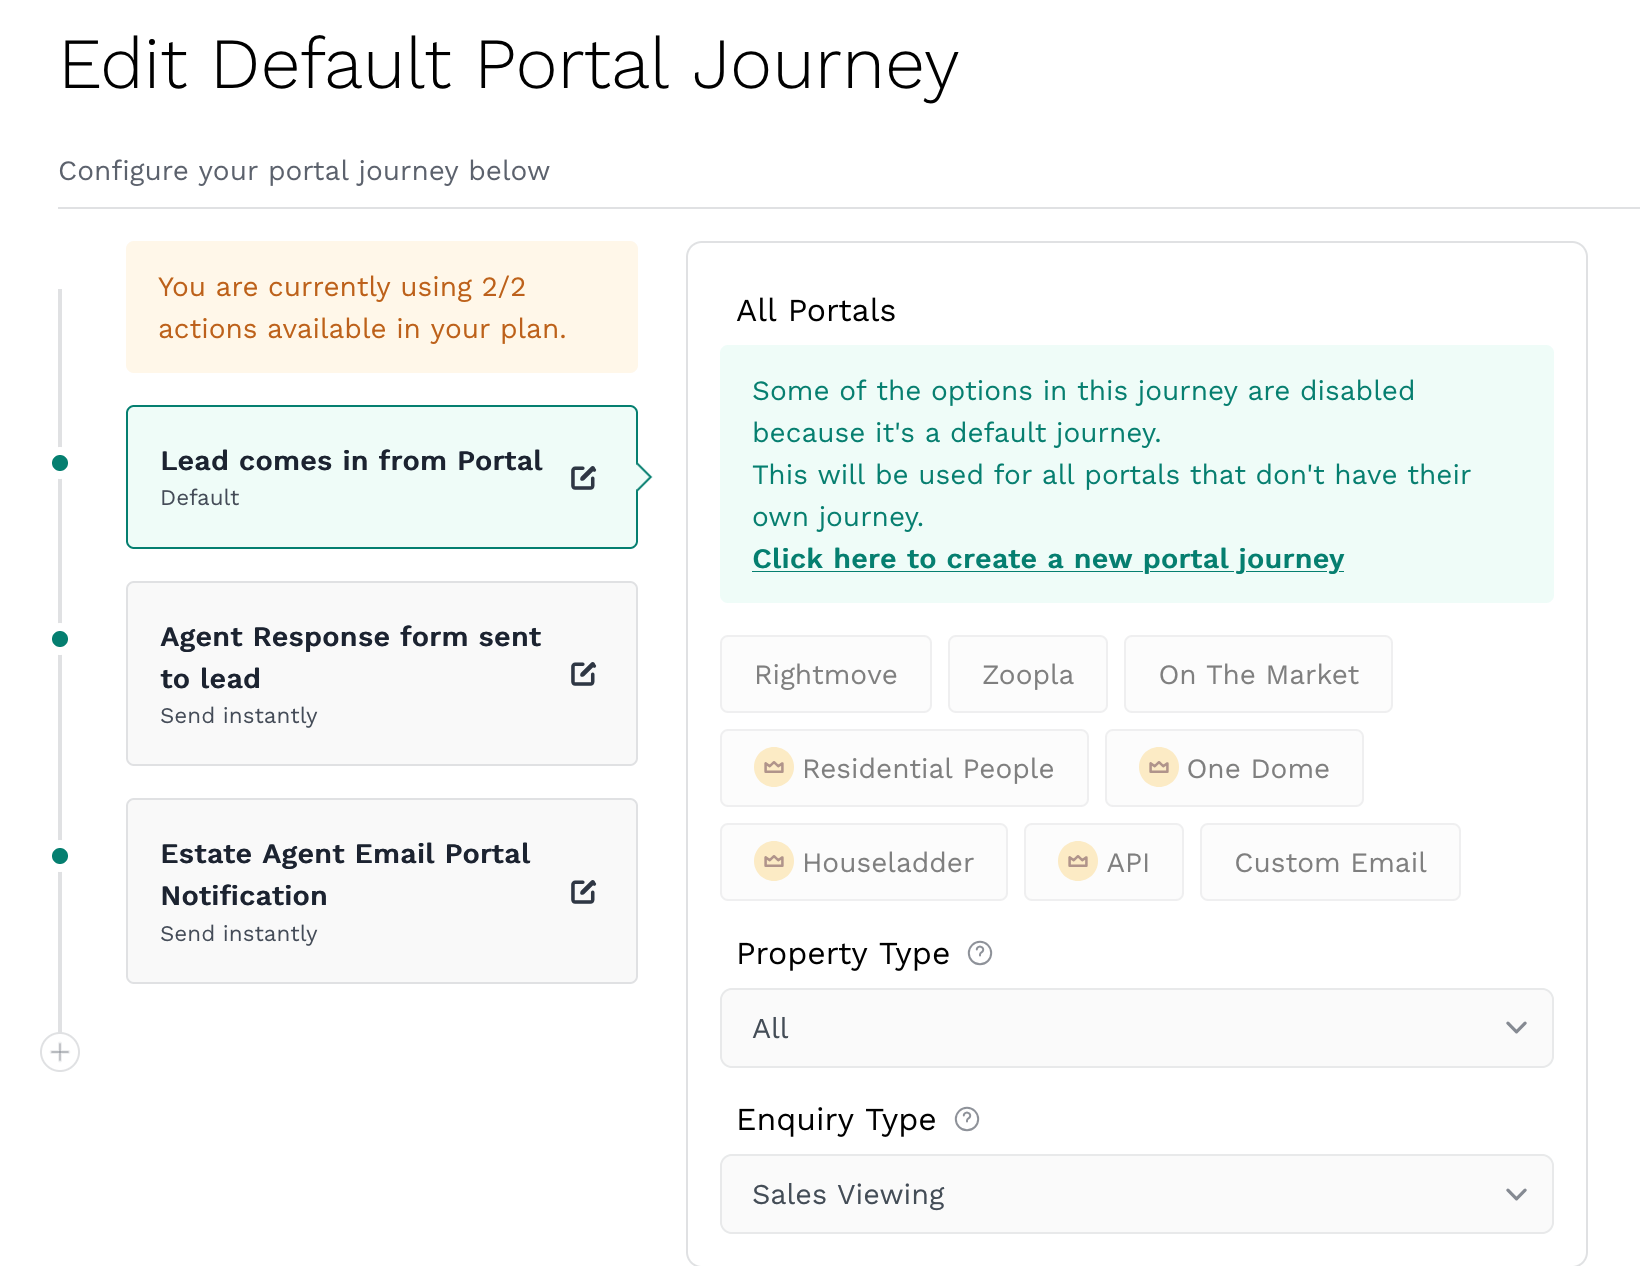
This is where your portal journeys are found, when a portal lead comes in, these control how they are responded to. There will be 3 portal journeys there one for Lettings viewing, one for Sales viewing and a catch all fallback.
If you got to the three dots under the Action column and Edit portal journey, you can see the steps of how leads will be responded to.
We will look at the journey of Sales viewing as an example. On the left hand side are the steps that a lead will go through, clicking on each one will show you the settings for them. The first step of the journey will always be Lead come in from portal, this sets where the lead comes from and the type of lead, you will see the various portals selected and the type of enquiry that it will respond to.
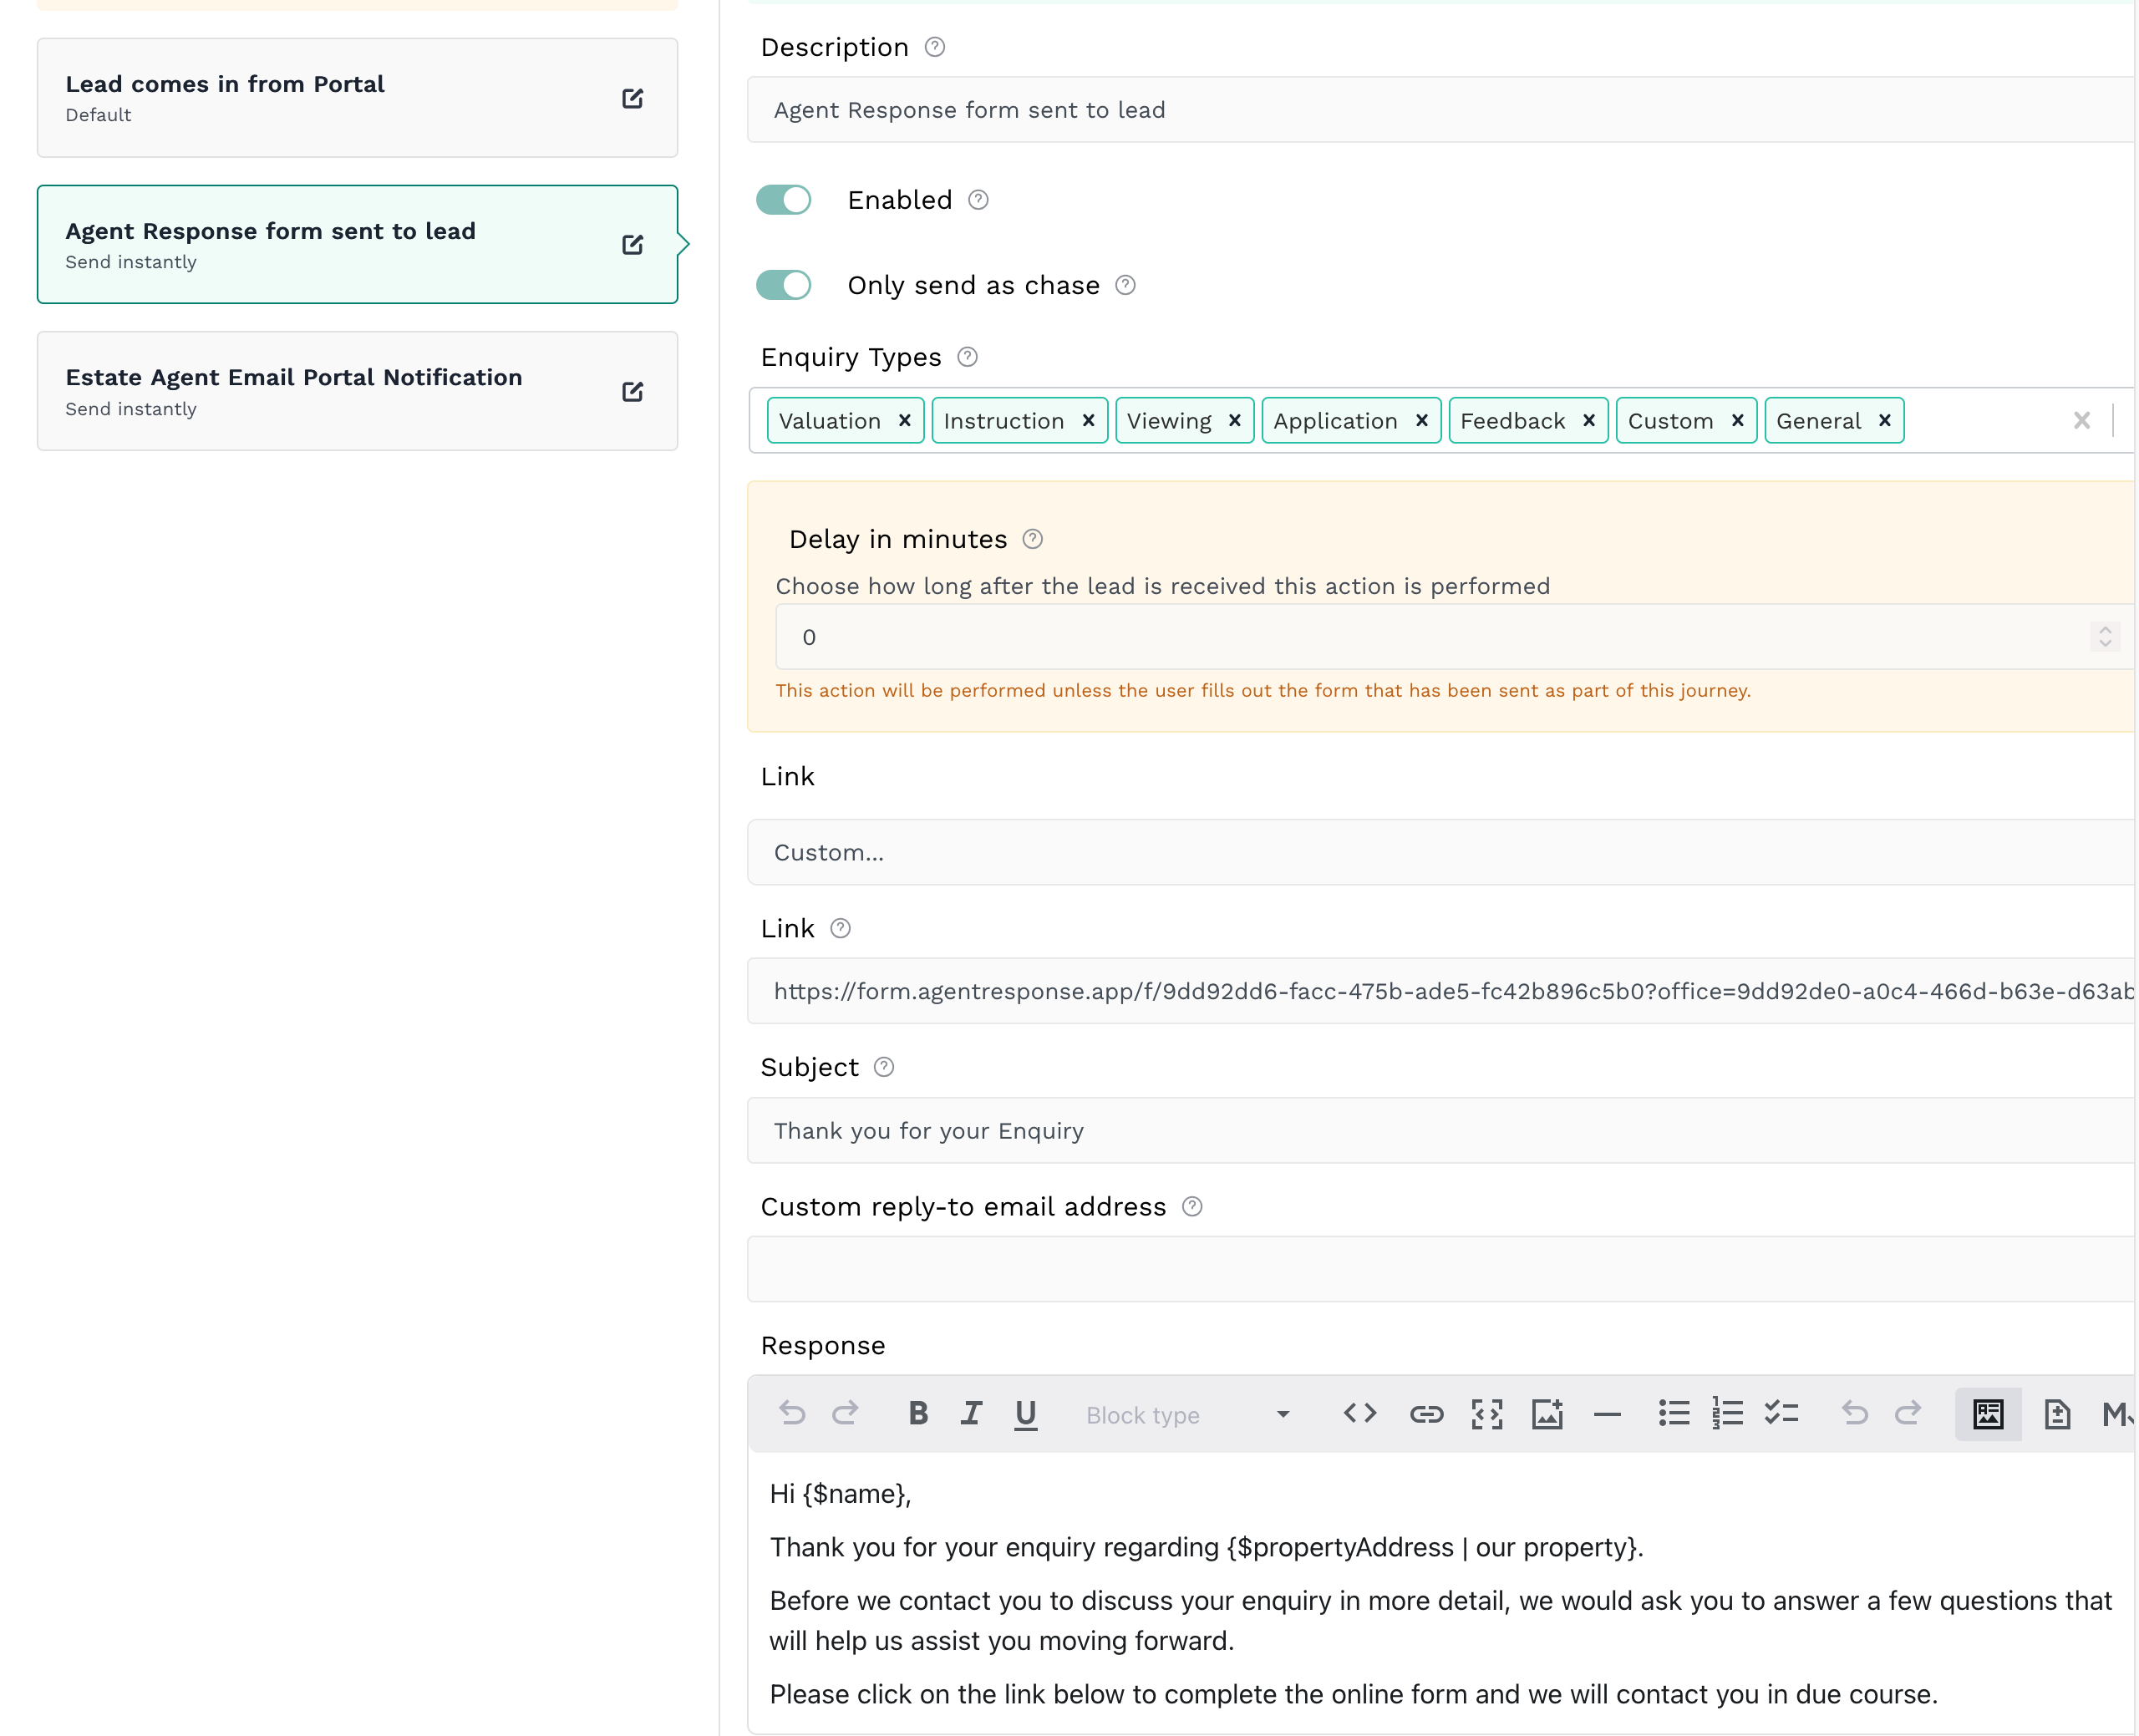
The second step is the Agent Response form sent to lead, when a lead comes in that matches the first steps criteria from the first step, this is what will be sent to the lead. You can set the form link, the subject and the email response to the lead.
Note: the {$name} and {$propertyAddress | our property} will dynamically pull in the name of the lead and the address they have messaged about into the email.
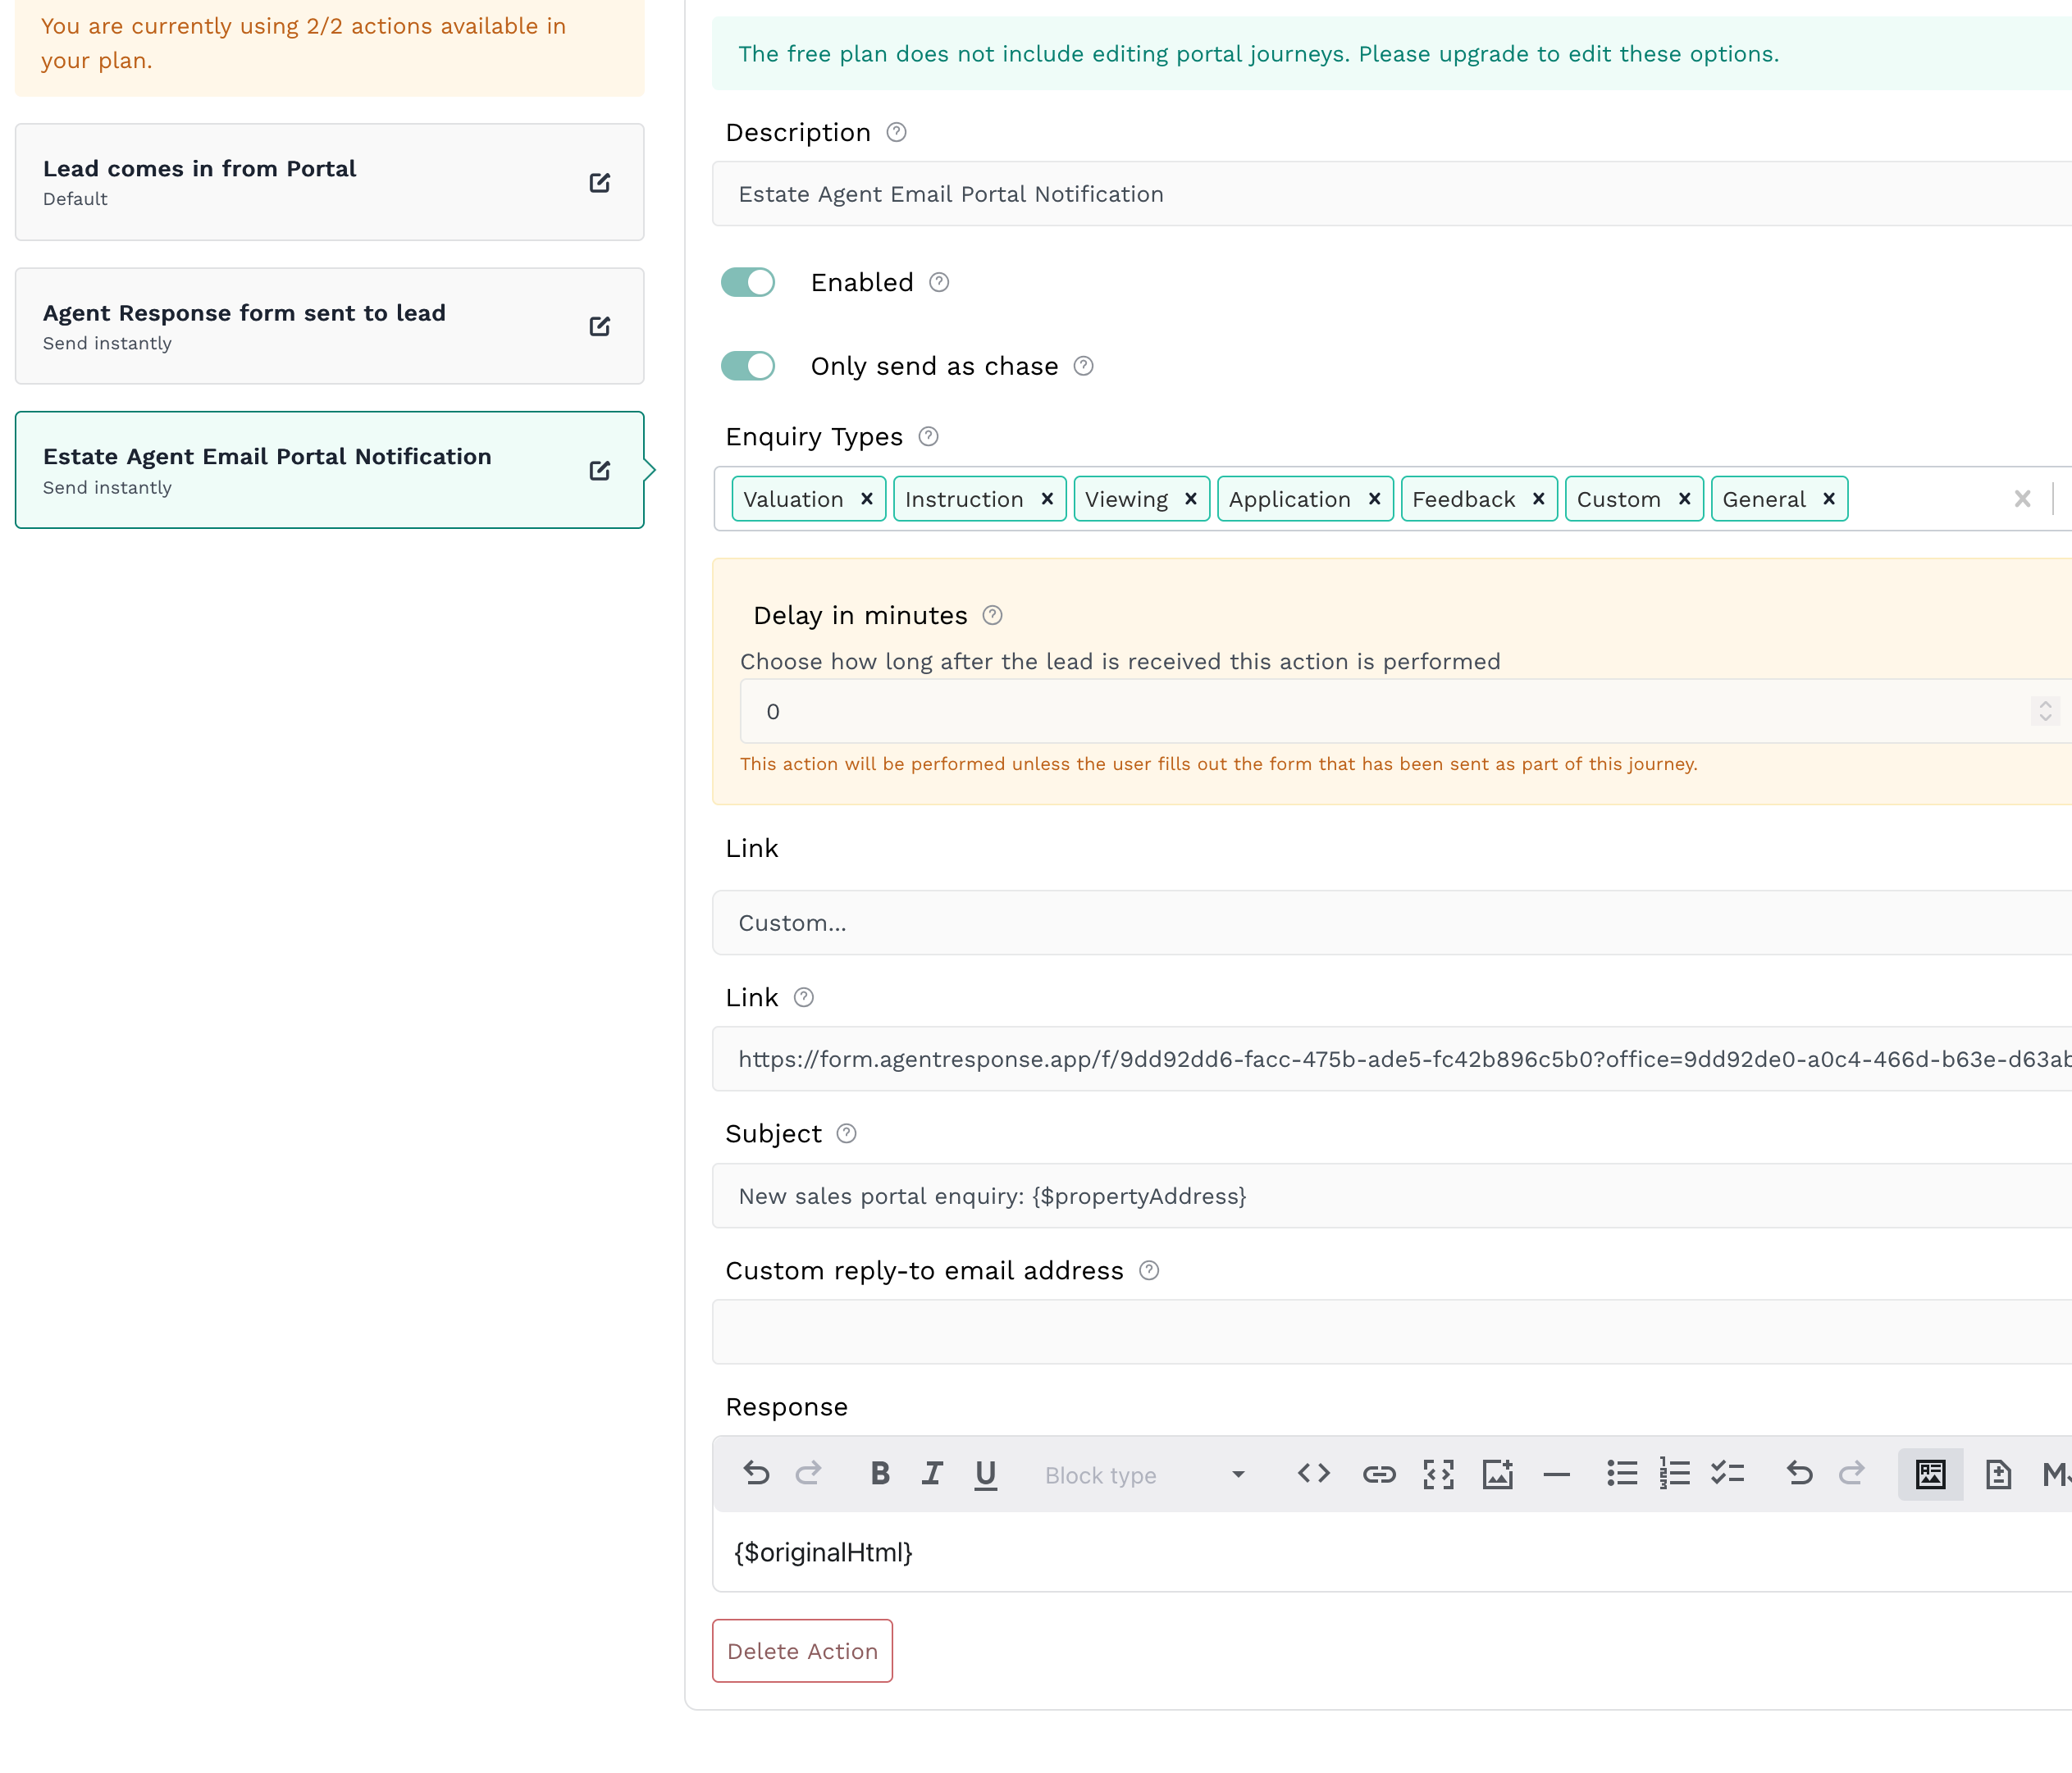
The final step in the portal journey for Sales viewing leads is the Estate agent email portal notification. This sends on the original email from the portal, to the estate agent.
Note: the ($propertyAddress} in the subject will dynamically use the name of the property enquired about and the {$originalHtml} in the response will use and display the email as it would have come from the portal.
4. Viewing your leads
Once Agent Response is all set up with the portals, you can view your leads in the Activity area in the top menu. There should be 2 example leads in there to show you what you can see.
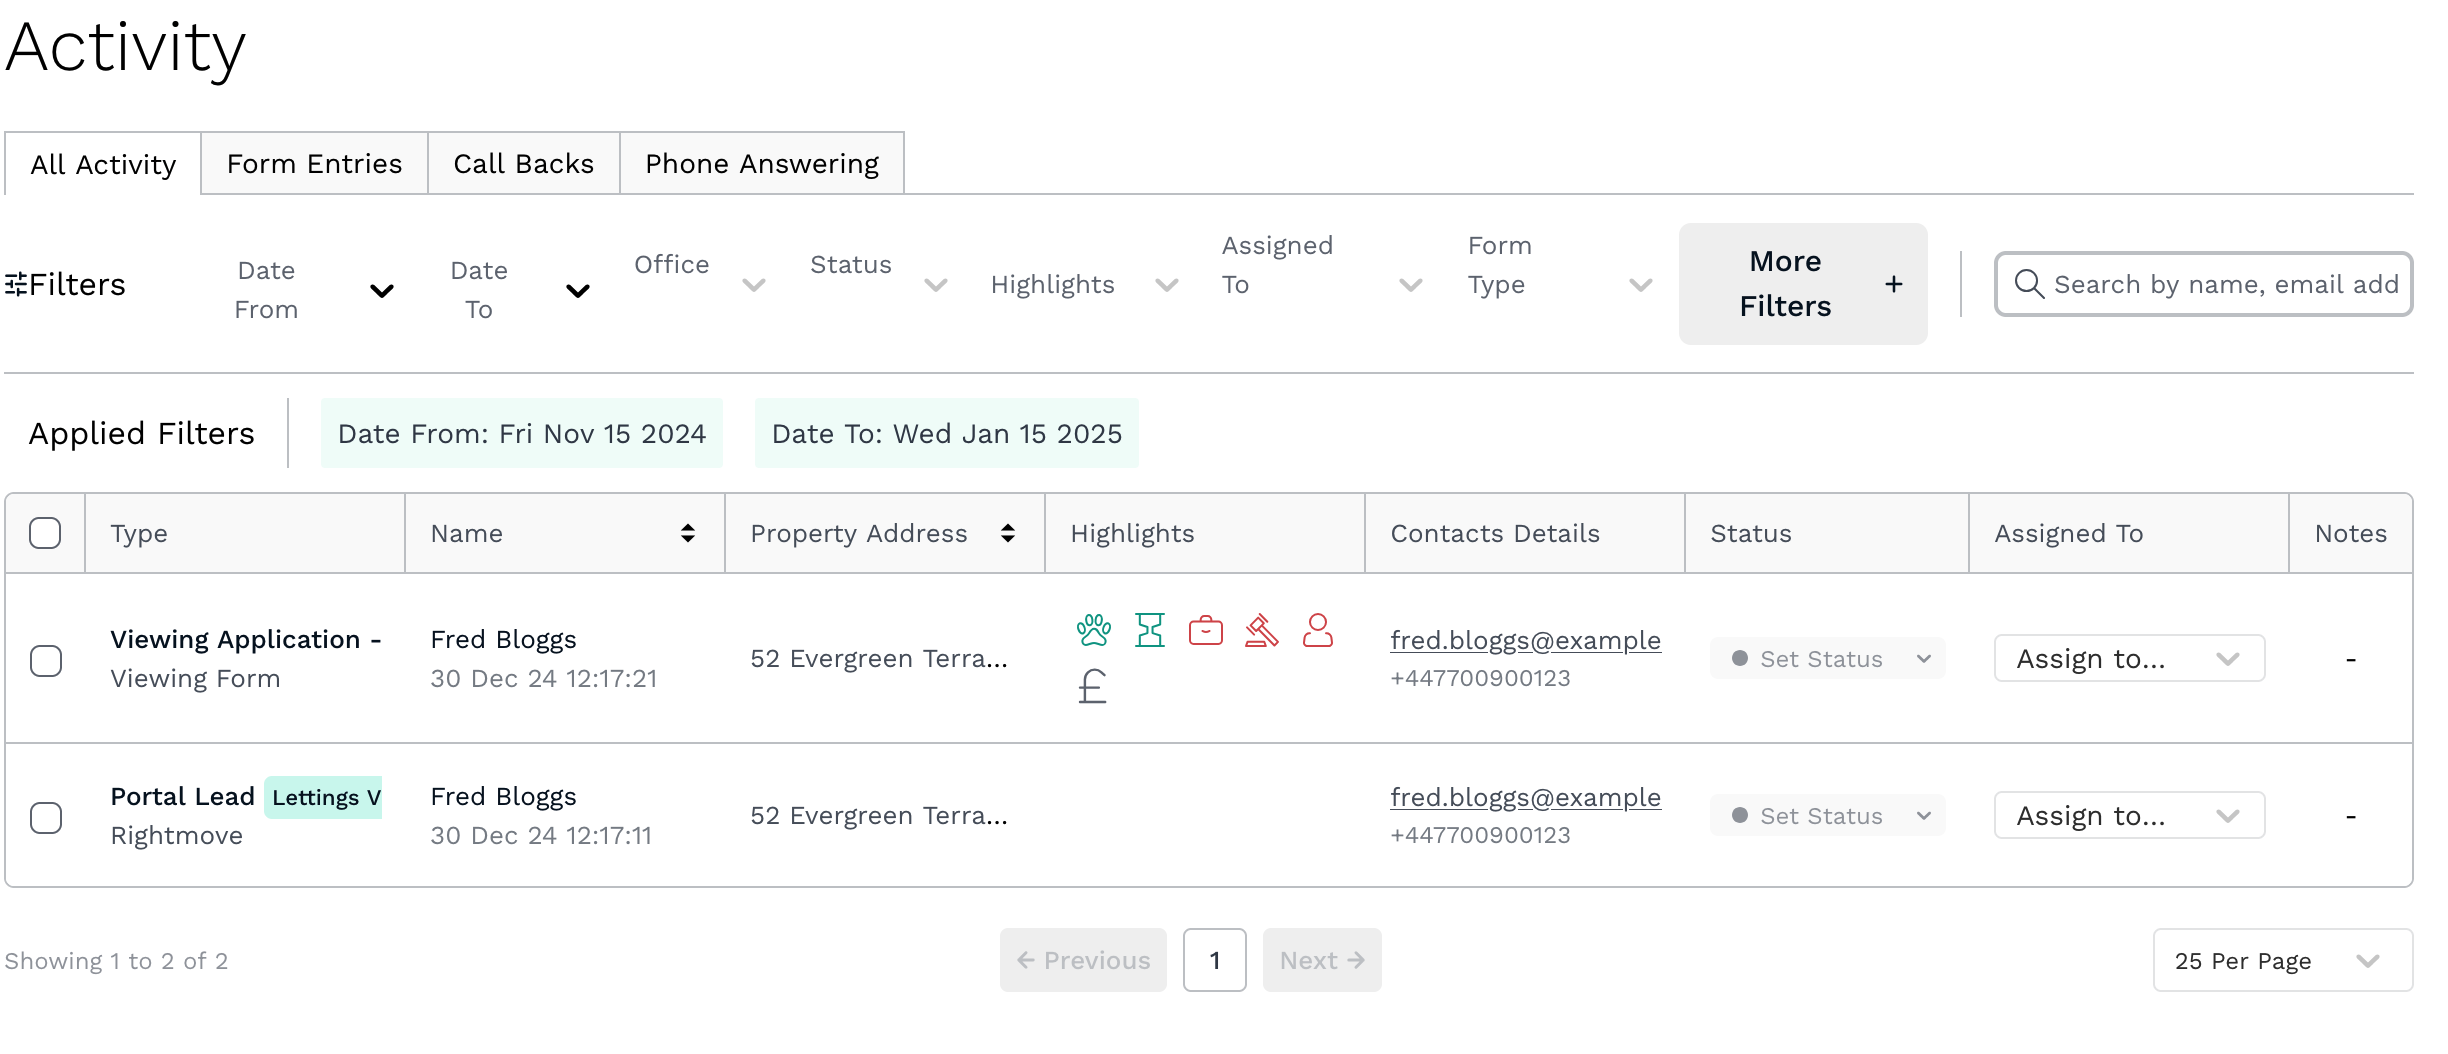
This will show you an overview of the lead, you can see the complete details by hovering over the row and clicking the eye icon.
![]()
On the right will slide out the complete details for this enquiry, such as the responses to the form.
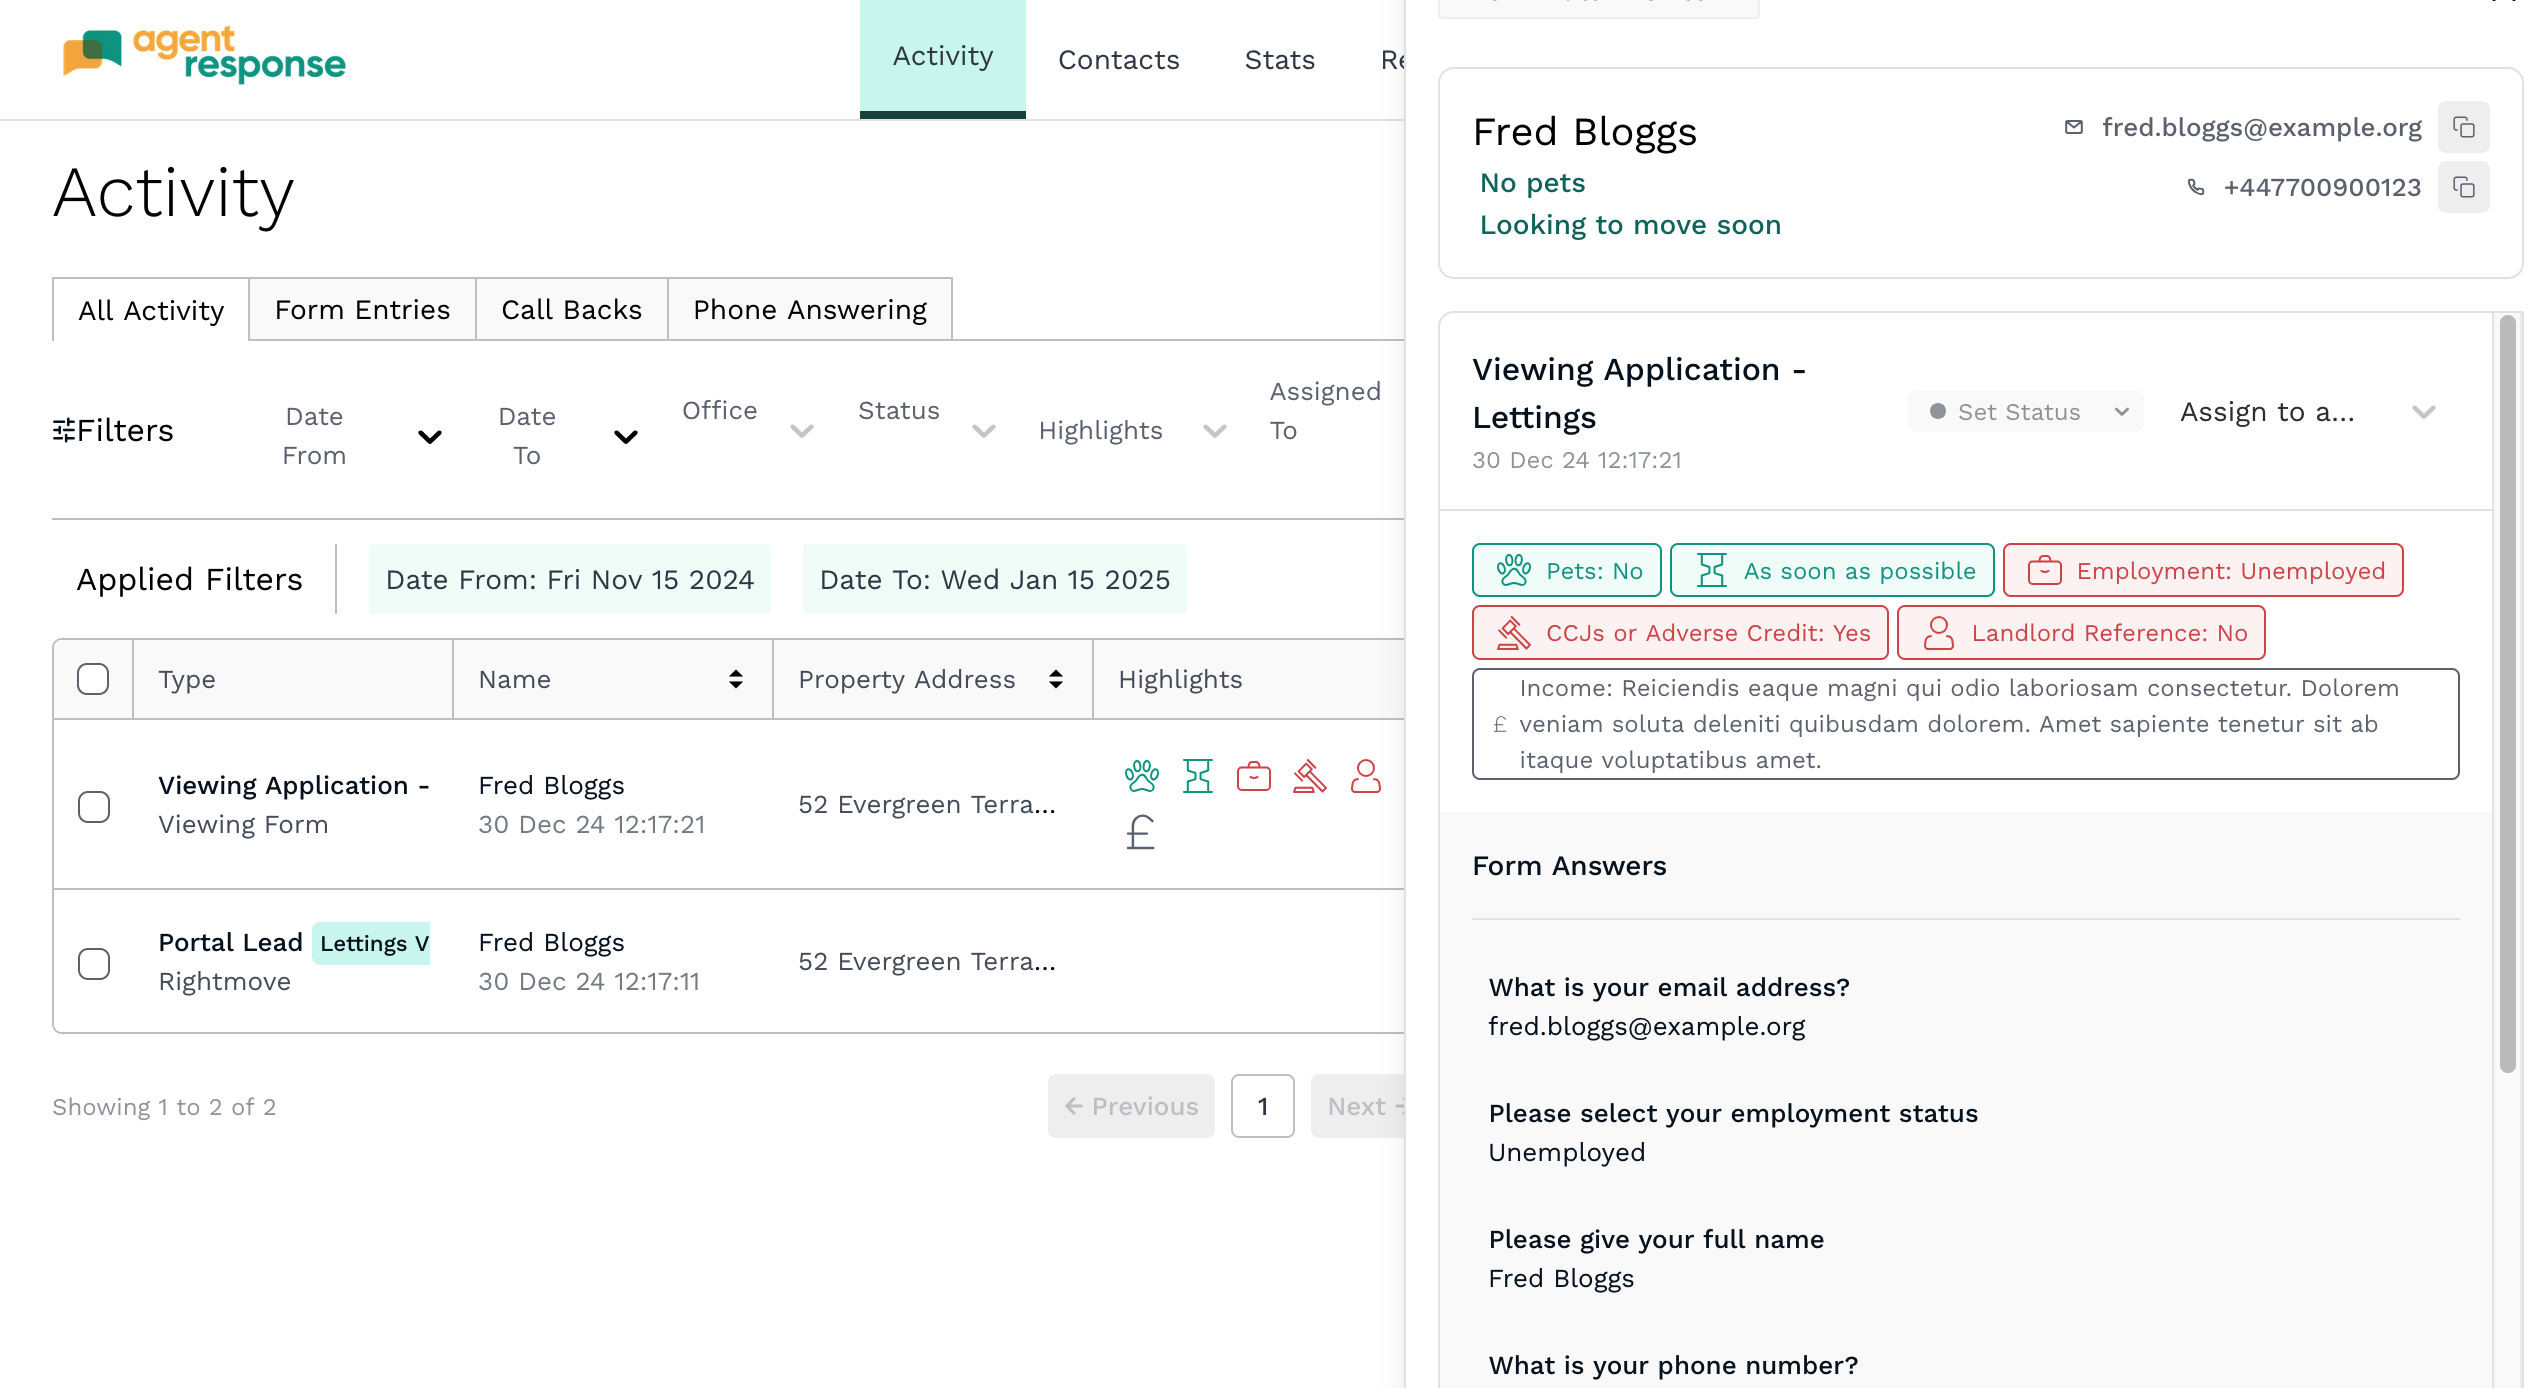
If you want a more in depth look at how to use the Activity area in Agent Response, you can find out more here.
|
Rate this Topic:
|
|||
|